First is the most obvious, you download MUGEN.
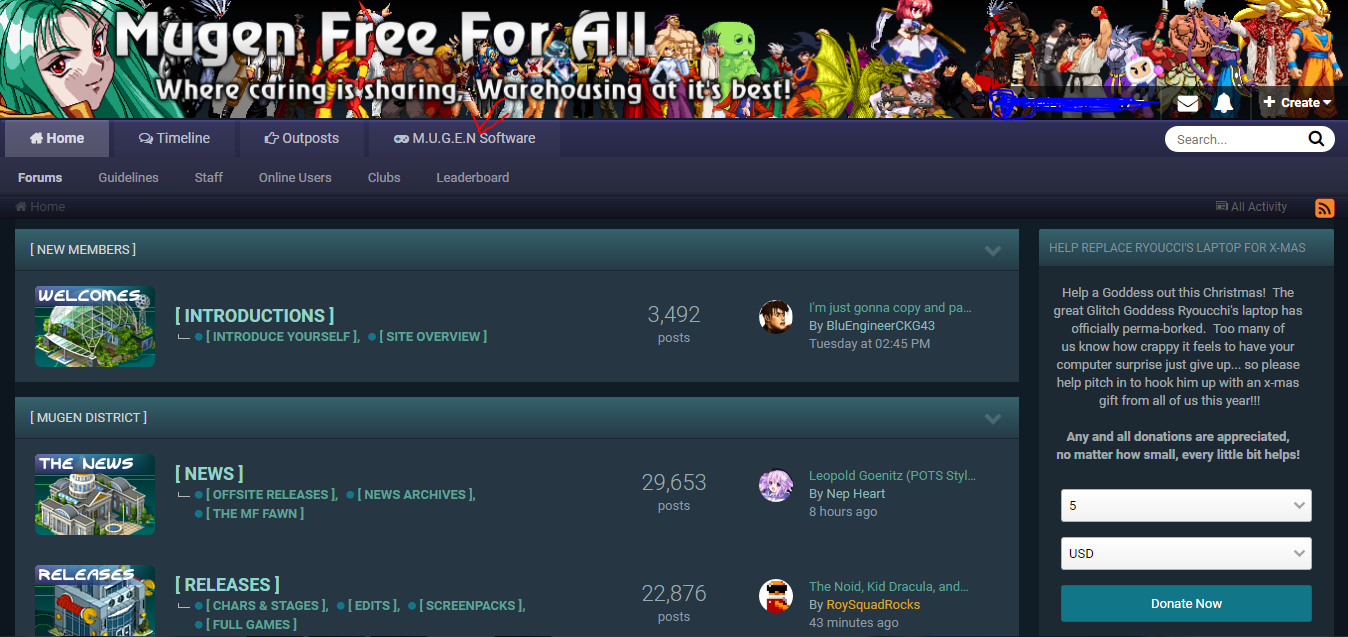
There are many websites that'll give you MUGEN, but MUGEN Free for All is the best place to get MUGEN itself, the characters, stages, and more.
Go to MUGEN software and select MUGEN 1.0, since I prefer that version best. The link will take you to a Mediafire page, right click on the Download button.
Go to MUGEN software and select MUGEN 1.0, since I prefer that version best. The link will take you to a Mediafire page, right click on the Download button.
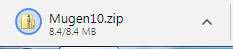
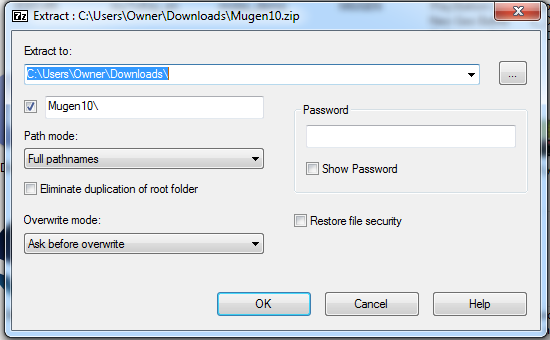
Once you download MUGEN 1.0, the next step is to unzip it using something like winrar or something like that. I use 7zip because it's easy for me to use.
Get into the MUGEN folder and run it for the first time.
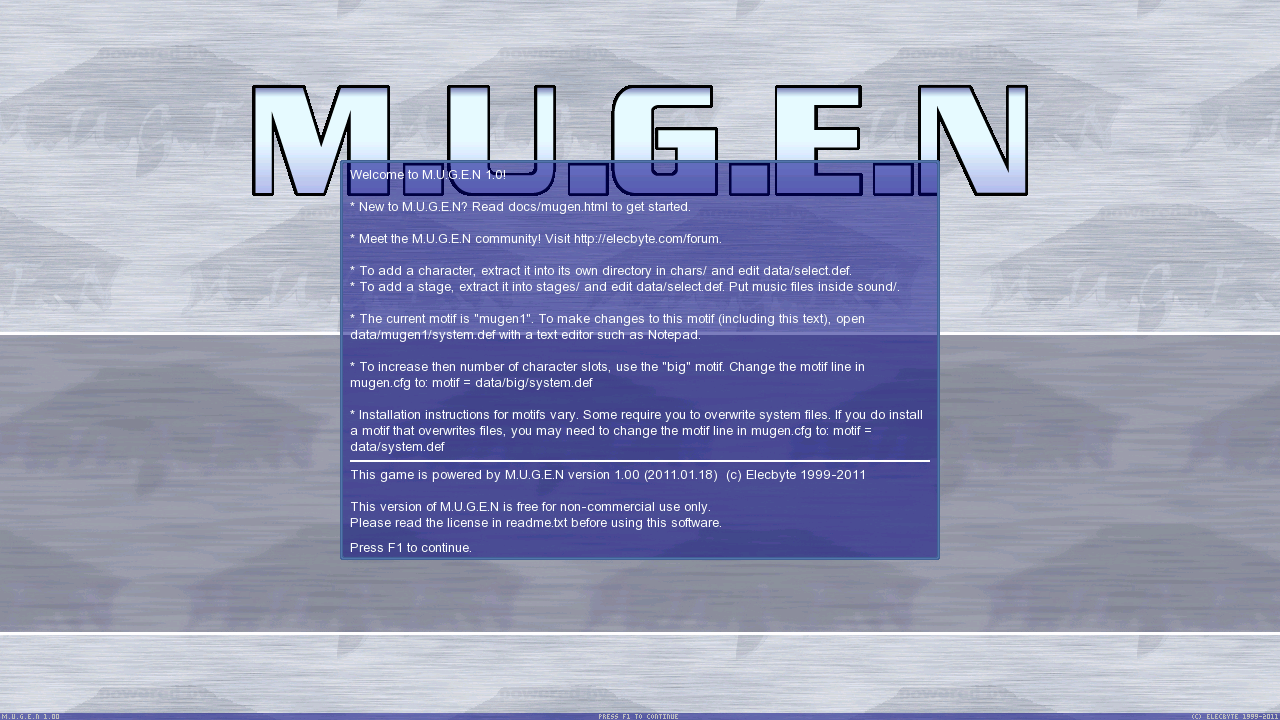
This text box should pop up when you run it for the first time, just press F1 to get rid of it.
MUGEN has 1 exclusive character, which is Kung Fu Man, but what if you want to add more characters or just get rid of Kung Fu Man?
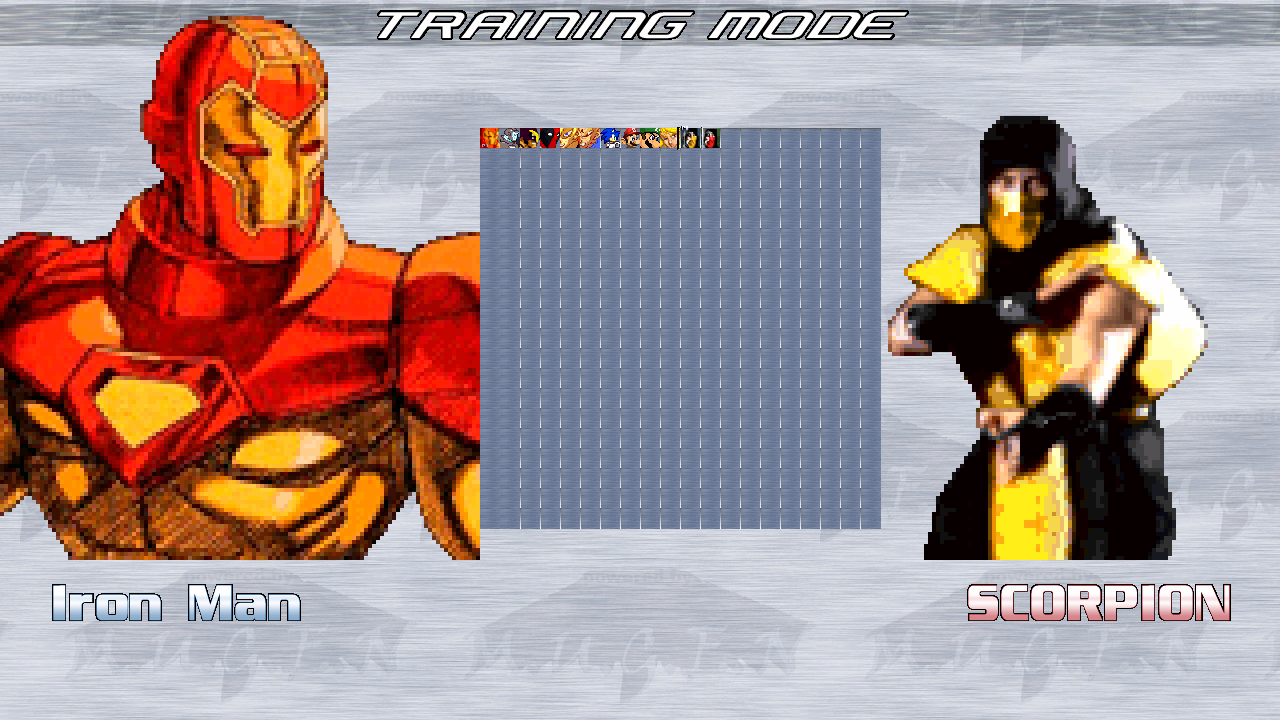
Let's say that you want to download Iron Man, Goku, and Sonic as a few examples. A Google search should do the trick, or go to the Collections section in MUGEN Free for All.
Let's say that you want to download Iron Man, Goku, and Sonic as a few examples. A Google search should do the trick, or go to the Collections section in MUGEN Free for All.

Once you have all of the characters you wanted to get, unzip 'em the same way you did to MUGEN 1.0. Keep in mind, some character folders are inside another folder, like Iron Man for example. Just get the character folder out of the other folder then you're fine.
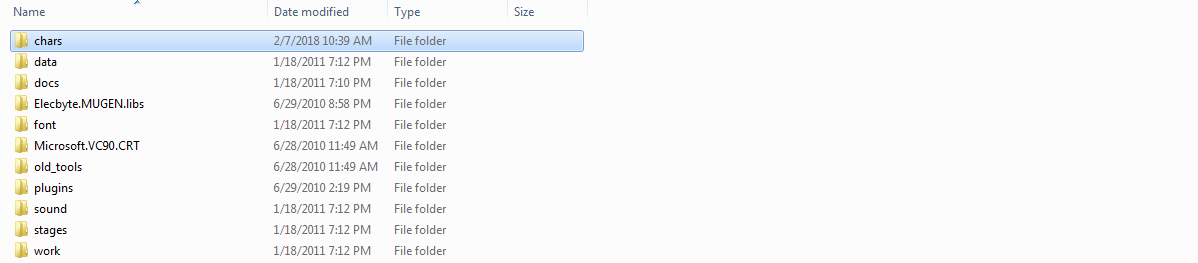
Once your characters are unzipped, move them into the folder that's highlighted, which is in the MUGEN folder.
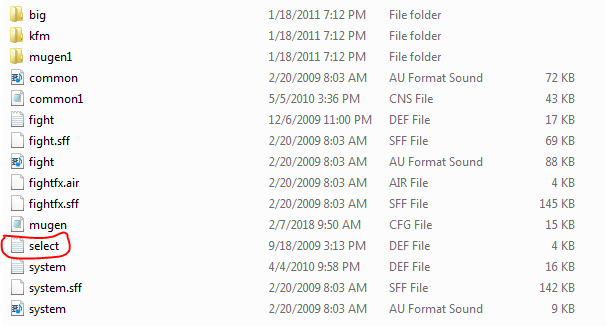
After you move your characters into the "chars" folder, go into the "data" folder, and find the select file, which is circled in the picture, then open the file with notepad.
The characters that you downloaded and unzipped have a file called a DEF file, it's basically the characters definition file and it's the file that puts the character into MUGEN using the select file. You need this file, other wise MUGEN won't read the character. The DEF file's name also has to match the character's folder, otherwise MUGEN will not be able to read the character, therefore the character will not be in the roster.
The characters that you downloaded and unzipped have a file called a DEF file, it's basically the characters definition file and it's the file that puts the character into MUGEN using the select file. You need this file, other wise MUGEN won't read the character. The DEF file's name also has to match the character's folder, otherwise MUGEN will not be able to read the character, therefore the character will not be in the roster.


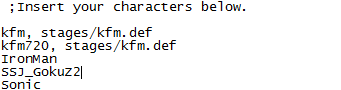
Copy the DEF file names and paste them into the select file right here. Save the file afterwards.
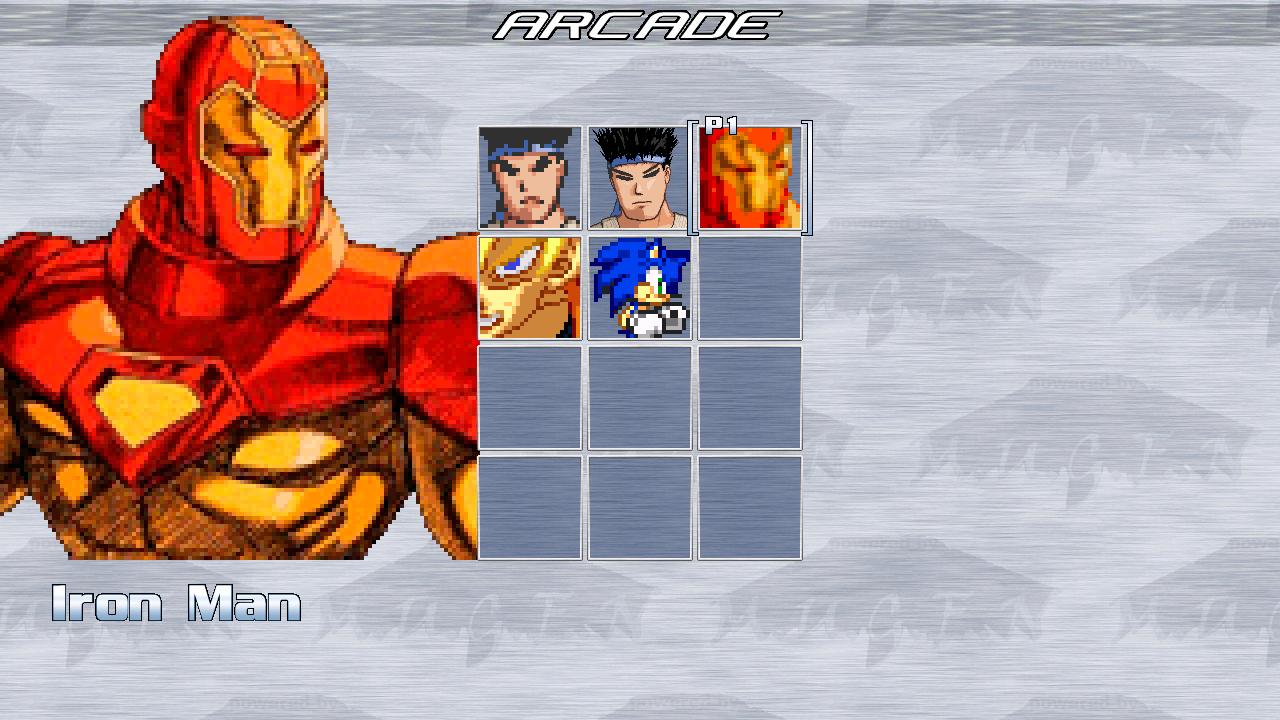
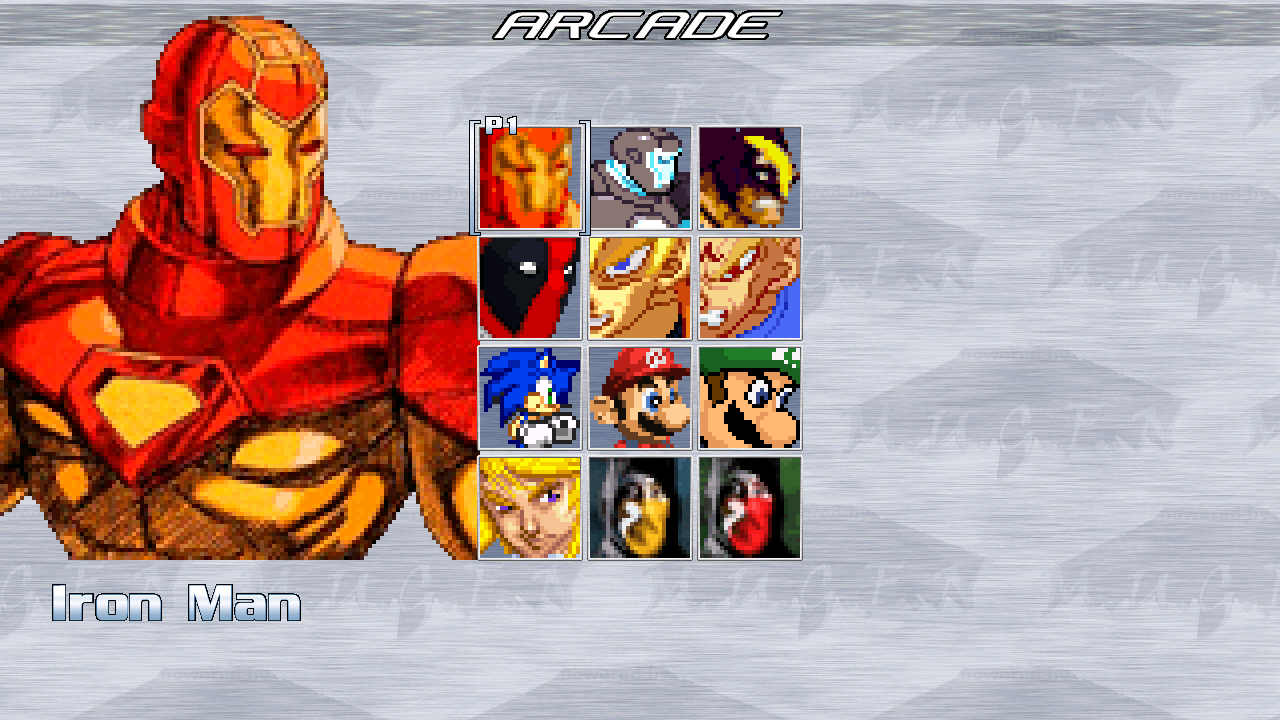
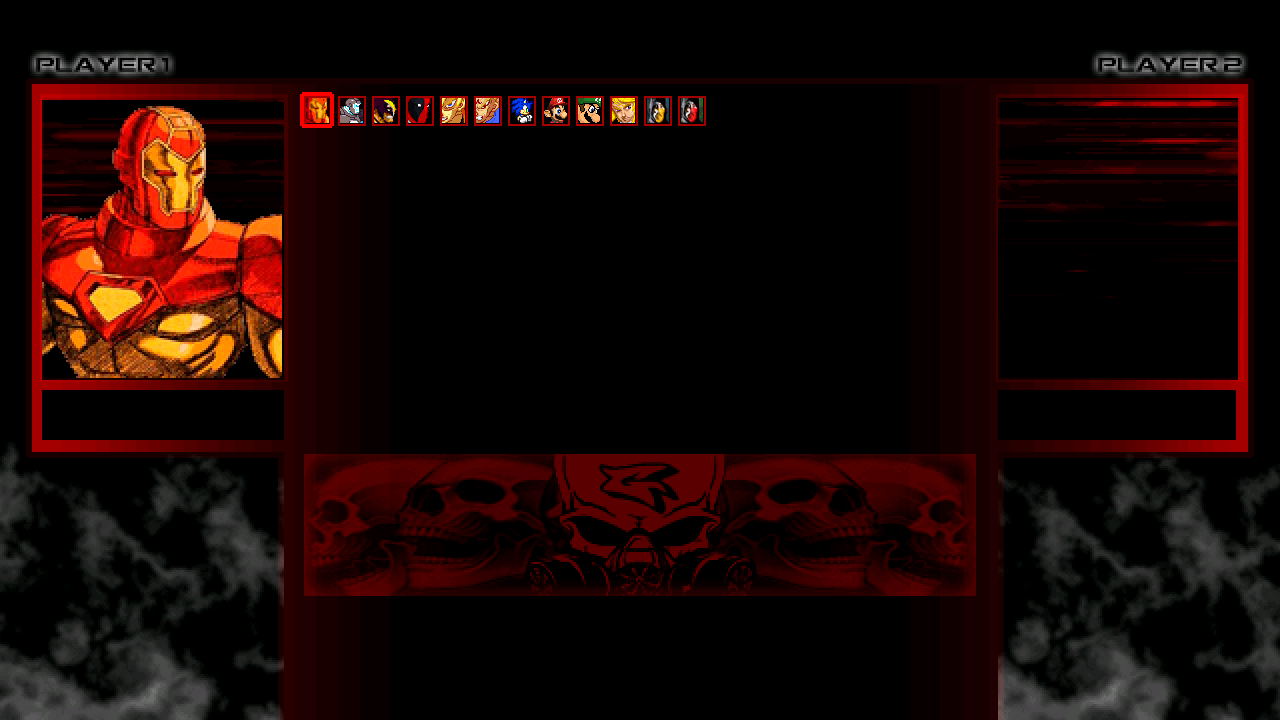
Run MUGEN again, then you should be able to see your new characters in your roster.
Alright, now you have more characters in your roster, but what about stages? MUGEN has 2 exclusive stages installed, the training room (Stage 0) and the mountain side temple, which is Kung Fu Man's stage. What if you want to get another stage?
The process is similar to putting the characters into the roster, but there's a bit of a twist.
I'm gonna use my Yoshi's Island stage as a example. You download and unzip the stage, but you don't put the stage folder into "stages", which is in the MUGEN folder with "chars" and "data".
Instead, you move the DEF file and the SFF file into stages. If you don't know what a SFF is, it's a sprite file for the characters and stages. You need this file as well, other wise MUGEN won't detect the file and it will crash when you select the stage.

Now copy the name of the DEF file and put it in the select file right here, but put in stages\ (or stages/) in first then the name of the stage, then end it with .def, like this. Save the file afterwards.

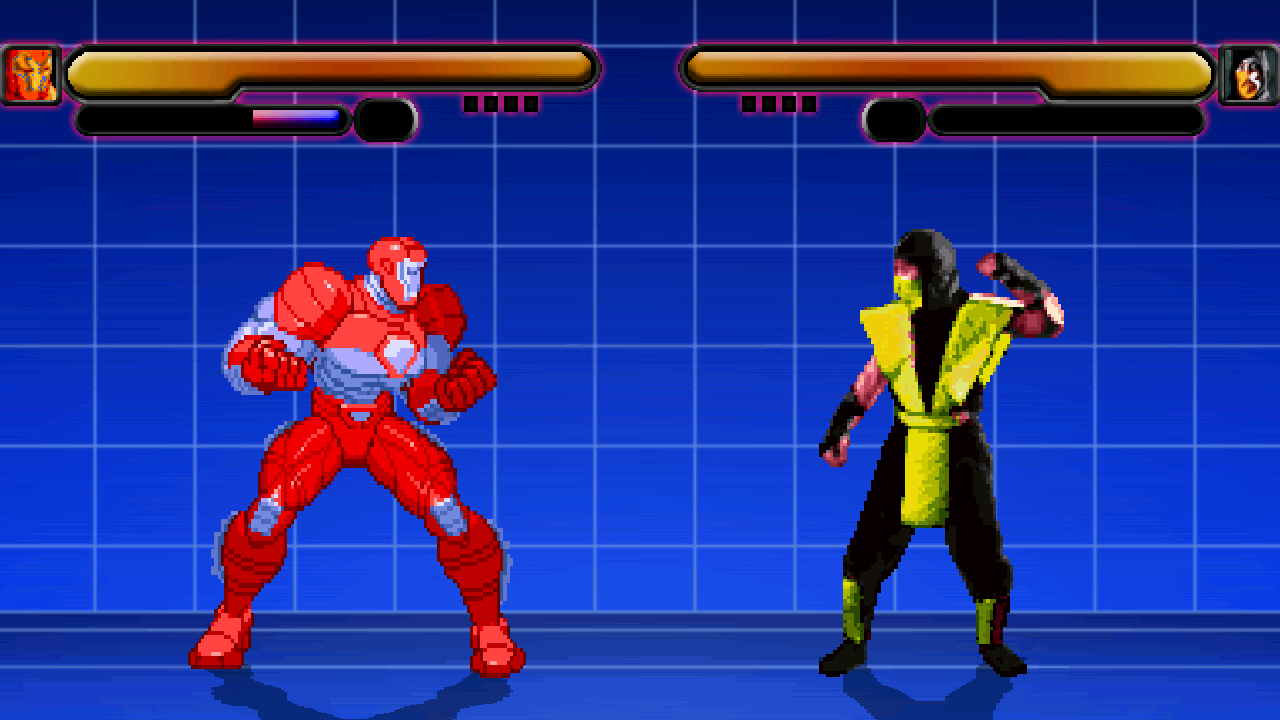
Run MUGEN again, then you should be able to see your new stage in the roster. Select the stage, then you're in a new battle field. You can add as many stages as you like.
Now you know how to add characters and stages, so let's say that you added more characters to your roster.
Now your roster's full, but let's say that you want to add some more characters. How can we add more slots to the roster? Let me show you.
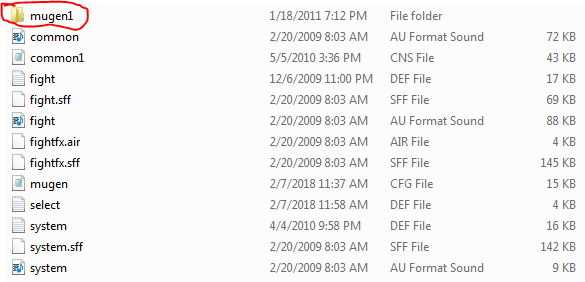

All of the stuff that you see here are files for the old WinMUGEN version. To edit the character select screen that's in the previous pictures, you need to go to the "mugen1" folder. In there, find the system file and open it with notepad.
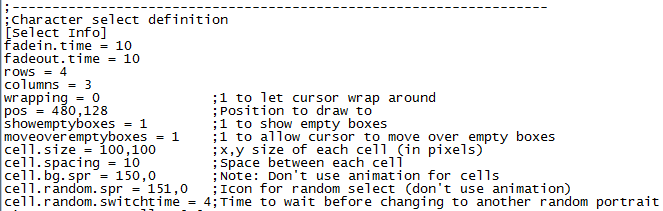
Scroll down until you see this. To change the number of slots, you'll have to change the number of rows and columns. Let's say that you change the number of rows and columns to 20. That'll give you a whole lot of slots.
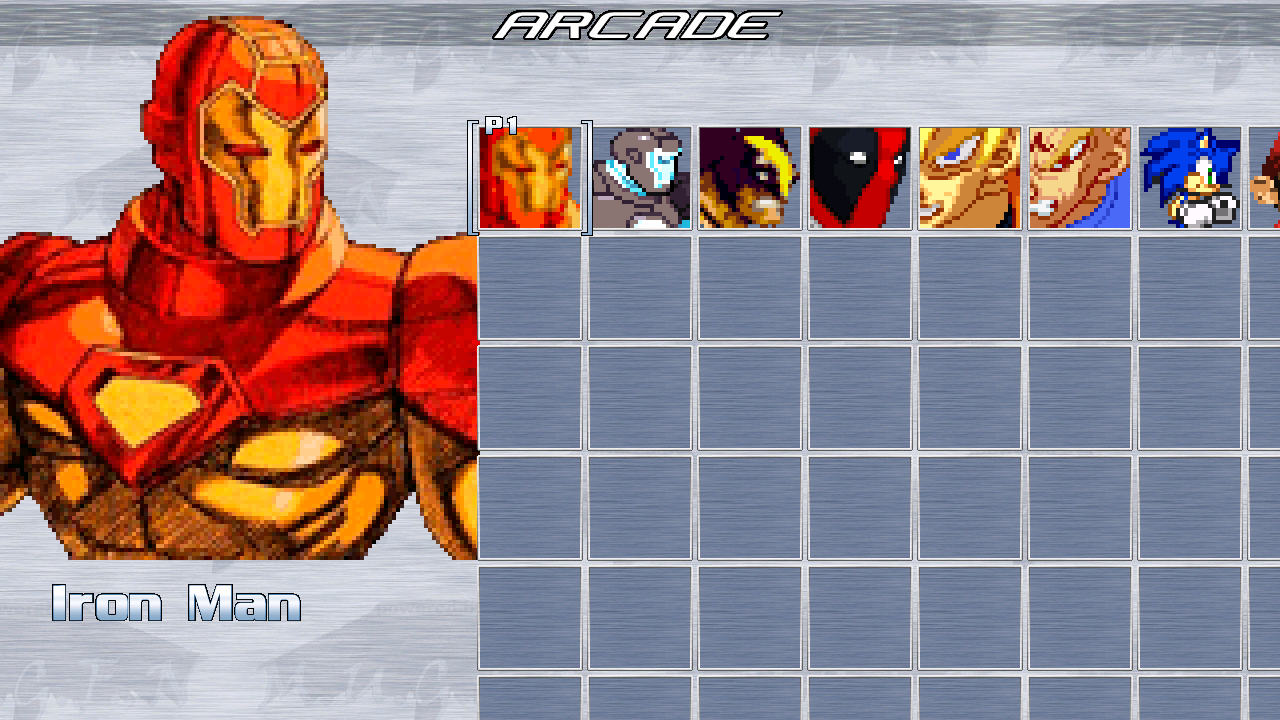
But that's not the end of it, the roster will look like this if you just change the rows and columns. You'll have to change the size of the slots manually.
But that's not the end of it, the roster will look like this if you just change the rows and columns. You'll have to change the size of the slots manually.
There's a piece of code you need to put in. The piece of code goes by this list: cell.bg.scale = x, y, cell.random.scale = x, y, p1.cursor.active.scale = x, y, p1.cursor.done.scale = x, y, p2.cursor.active.scale = x, y, and p2.cursor.done.scale = x, y.
This code will change the size of the slots and the cursor, making them much smaller than what they originally were. The characters' icons already have their own form of this code, portrait.scale = x, y.
This code will change the size of the slots and the cursor, making them much smaller than what they originally were. The characters' icons already have their own form of this code, portrait.scale = x, y.
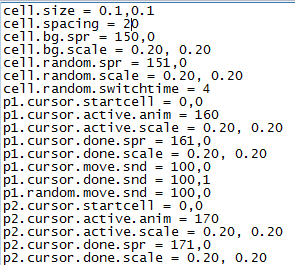
When it comes to something like this, it's all about guessing numbers (decimals) and using trial/error. Keep guessing decimals and keep running MUGEN until you make your roster look exactly how you want it to look.
Now let's say you wanted to add some music to your MUGEN. If you already have some songs in your computer, find some that you want to use, or just grab some from the internet. After that, put them into the sound folder, which is in the MUGEN folder (again).
If you want to add music to the default screenpack, go to the mugen1 folder and into system, then scroll down until you find "Music."
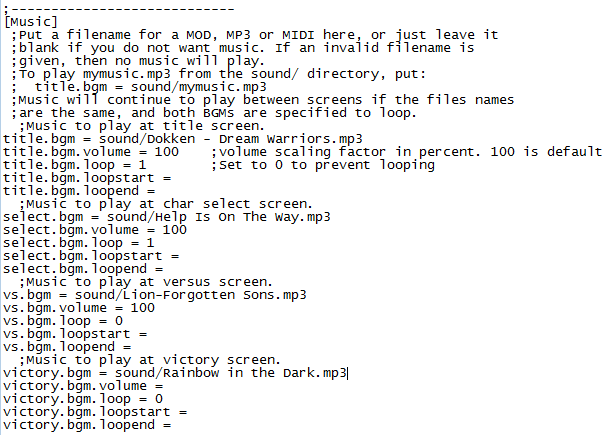
To add music to the menu, put in sound/name of song.mp3 in title.bgm. Once that's done, run MUGEN again and you should be able to hear it. Don't worry about the loopstart and loopend, just worry about the loop. The same applies to adding music to stages that don't have music with them.
If you want to make things a little easier and not do all that extra work to add music and get extra slots, just download a screenpack. Right now I just got the Enemies of Fear screenpack. Like everything else, unzip the screenpack, but put it into the data folder and leave it there. then go to the mugen.cfg file and open it with notepad.
If you want to make things a little easier and not do all that extra work to add music and get extra slots, just download a screenpack. Right now I just got the Enemies of Fear screenpack. Like everything else, unzip the screenpack, but put it into the data folder and leave it there. then go to the mugen.cfg file and open it with notepad.

Once it's opened, you should be able to see "motif," which is the type of screenpack that MUGEN is using. Now some screenpacks come with their own MUGEN and data folder, so set the motif to "data/E.O.F 1.0/data/system.def."

Also, some screenpacks have their own select file, which is empty. Which means that the specific screenpack (Enemies of Fear) doesn't support the roster of the default one, so you're gonna have to copy the characters from your default to your new screenpack. After that, it should look like this.
Sometimes you'll have to you'll have to move the screenpack's fonts to the "fonts" folder (in the MUGEN folder) to make the fonts appear.
Now MUGEN's default resolution and window size is 1280x720. If you want to lower the size of the window, go to the MUGEN cfg file and scroll down until you find "Config."
Now MUGEN's default resolution and window size is 1280x720. If you want to lower the size of the window, go to the MUGEN cfg file and scroll down until you find "Config."
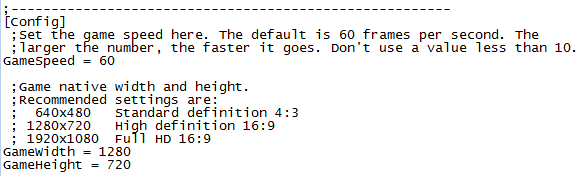
Change the width and height to your liking. I prefer 640x480.
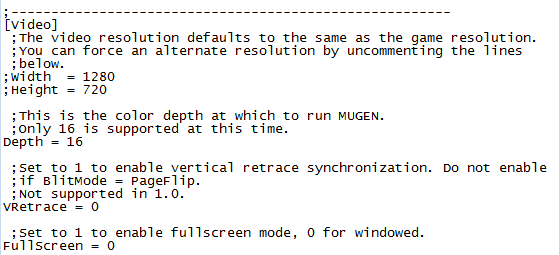
If you want to change the resolution, scroll down until you find "Video" and set the width and height to your liking, or just put it to full screen.
If you want to change the resolution, scroll down until you find "Video" and set the width and height to your liking, or just put it to full screen.
Alright, now you are truly ready to make your very own MUGEN game. I'd personally just keep the MUGEN to yourself just because, but other than that, have fun!
Notes:
- When you download and unzip MUGEN, there are comments in the files. The comments start with a semicolon so that MUGEN doesn't detect them, it counts them as a comment or something optional. Those comments are there to help you and make you learn more than what I just taught you.
Characters have other files: The SND file (the characters' sounds), the CMD file (the characters' commands for their moves), the CNS files (the code for their moves), and the ACT files (the characters' palettes) some characters may have more than 1 CNS file. You need these files as well, otherwise MUGEN will crash when you select the character if you don't have those files.
- Some characters have separate DEF files, which will change the characters' play style. Let's use Ryu by Phantom of the Server as a example. Ryu has 4 DEF files: Ryu (combines the other 3), Normal Ryu, Evil Ryu, and Master Ryu. To change Ryu's form, copy the character's folder for each form, copy the DEF file names, and paste them into the folders.
- Make sure that you have a anti-virus software installed in your computer. Some content may have viruses.
- For putting the characters into your roster, you could also use the folder that the character's folder is in, similar to putting stages into the roster. Like Ryu by POTS for example. You can use Ryu/EvilRyu, Ryu/Normal Ryu, and Ryu/MasterRyu, as a means to have the multiple forms of Ryu without the need to copy the folder and replacing the folder's name, and also to save space. Another option, primarily to make boss characters hidden and to make putting characters into the roster faster, is using a program called VSelect.
